This process is essentially the same as before but using the third-party tool GParted instead of the integrated Disk Management utility in Vista. Be sure to have your XP CD on-hand to repair potential boot loader complications.
Before proceeding realize that by removing your Windows 7 installation and partition you will be deleting any documents
, pictures, videos etc. which you've accumulated on the Windows 7 partition if you haven't backed them up previously, so consider doing that before continuing.
Download the latest copy of GParted here, and then burn it to a disc as an image file.
After you've downloaded and burned your image of GParted, pop it in your optical drive and reboot. Shortly after booting off the disk you'll have to choose your preferred language, keymap and screen resolution.
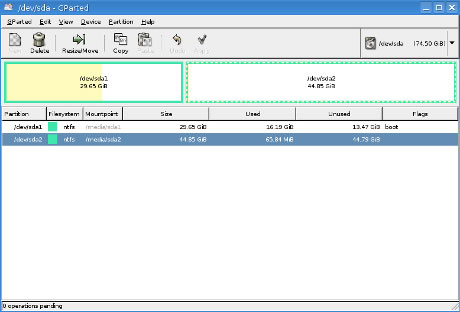
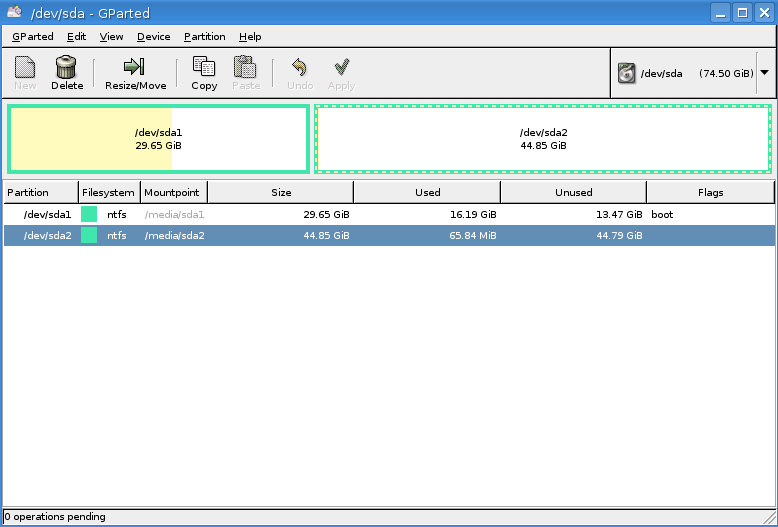
Once the partition software has loaded, right click the partition where Windows 7 resides (it's probably the second partition on “dev/hda1” if you followed our dual boot guide) and choose “Delete”.
You should now see unallocated space on your hard drive where Windows 7 once laid.
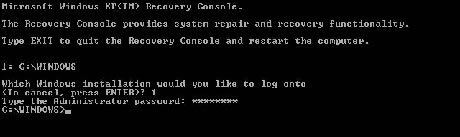
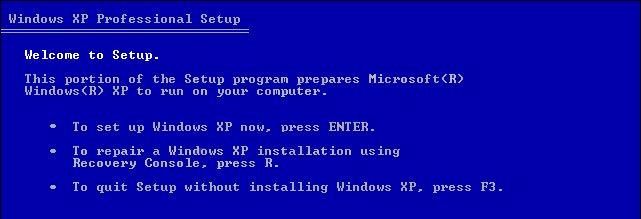
Boot using your Windows XP CD and after the initial loading process you should be met with three options: “Enter” to setup Windows, “R” to load the Recovery Console and “F3” to quit without doing anything, we want to hit “R” for the Recovery Console.

Before proceeding realize that by removing your Windows 7 installation and partition you will be deleting any documents
, pictures, videos etc. which you've accumulated on the Windows 7 partition if you haven't backed them up previously, so consider doing that before continuing.
Download the latest copy of GParted here, and then burn it to a disc as an image file.
After you've downloaded and burned your image of GParted, pop it in your optical drive and reboot. Shortly after booting off the disk you'll have to choose your preferred language, keymap and screen resolution.
Once the partition software has loaded, right click the partition where Windows 7 resides (it's probably the second partition on “dev/hda1” if you followed our dual boot guide) and choose “Delete”.
You should now see unallocated space on your hard drive where Windows 7 once laid.
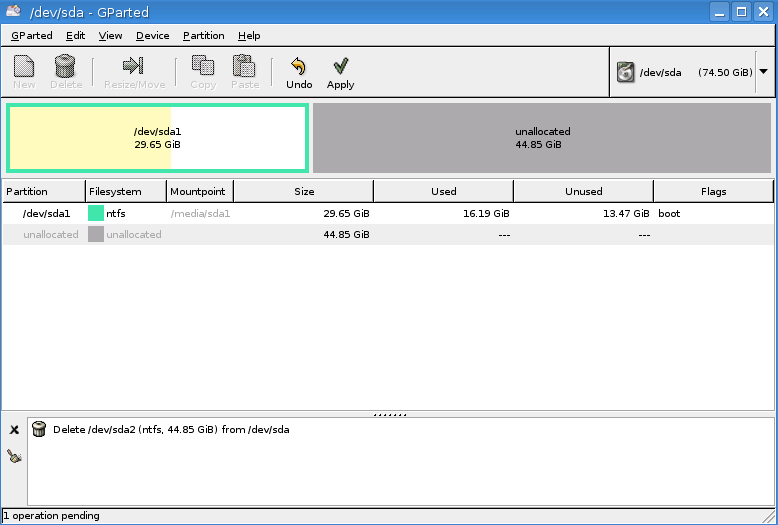
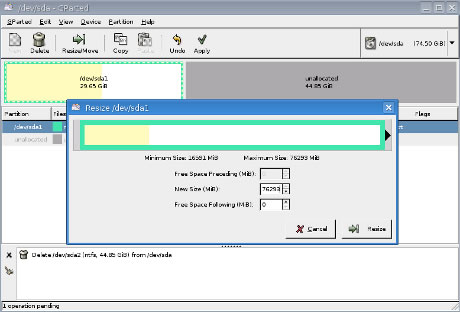
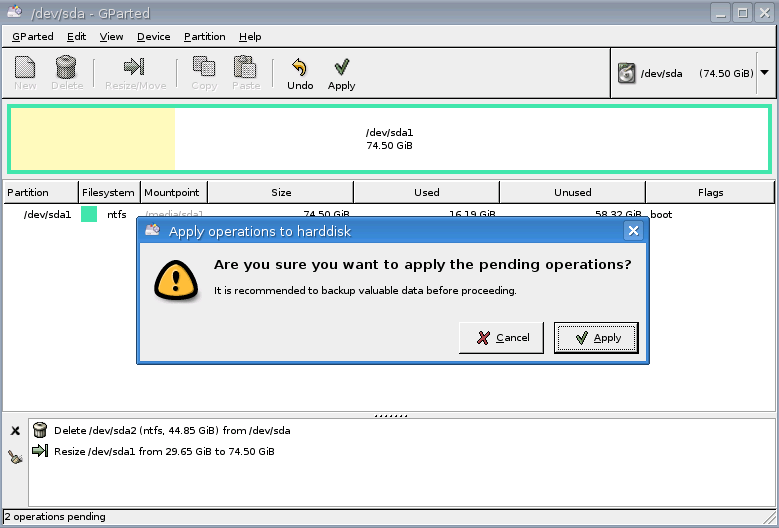
Right click your original (and probably only remaining) partition, choose “Resize/Move” and fill in 0 for both the free space preceding and following to occupy the entire unallocated space.
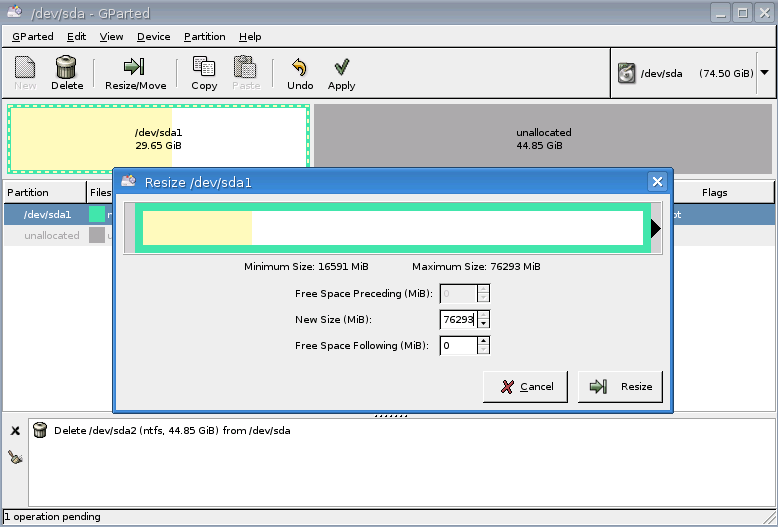

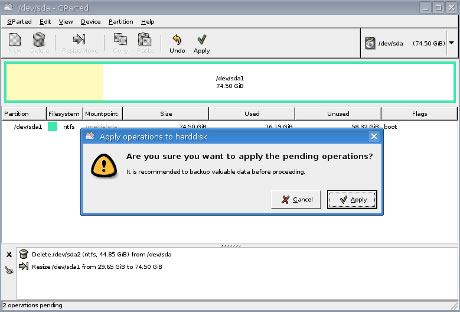
Be sure to click apply or all changes made thus far will not be put into effect.
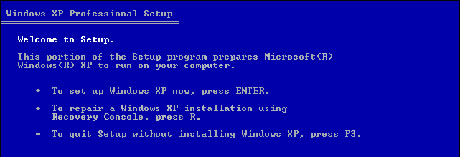
Repairing XP's boot loader:
Now, at this point you may or may not be able to boot into XP as you've just potentiallybotched your boot loader - don't worry! Even if you can access XP but want to get rid of the OS selection during boot up, continue reading.Boot using your Windows XP CD and after the initial loading process you should be met with three options: “Enter” to setup Windows, “R” to load the Recovery Console and “F3” to quit without doing anything, we want to hit “R” for the Recovery Console.
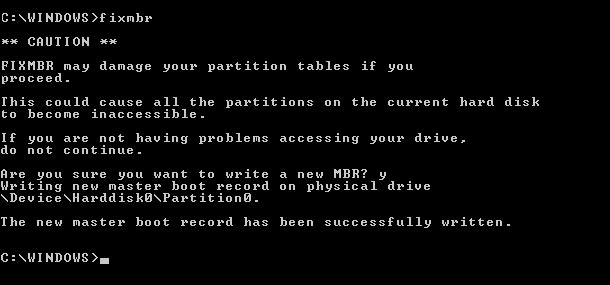
The Recovery Console will search for all instances of Windows and ask you to select one. Enter the number pertaining to your XP installation, and you'll be prompted for an Administrator password (if you're not sure what it is you likely don't have one, just hit enter).
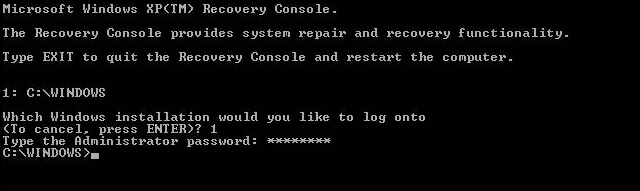
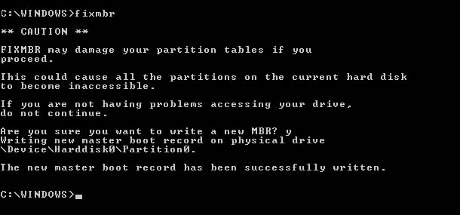
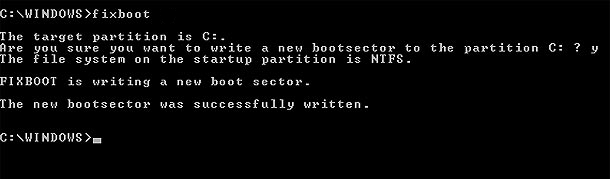
Now, enter “fixmbr” (confirm with “y”) and upon completion enter “fixboot” (confirm with “y”).
Enter “exit” to reboot your system, remove your XP CD and you should be good to go.
Comments